

 Tracer
Step 1: Create API Key
In Datadog, create an API Key. To create an API key, go to your organizational settings in Datadog and click API Keys. Or visit https://app.datadoghq.com/organization-settings/api-keys- Click + New Key at the top right of the screen
-
Name your new key tracer
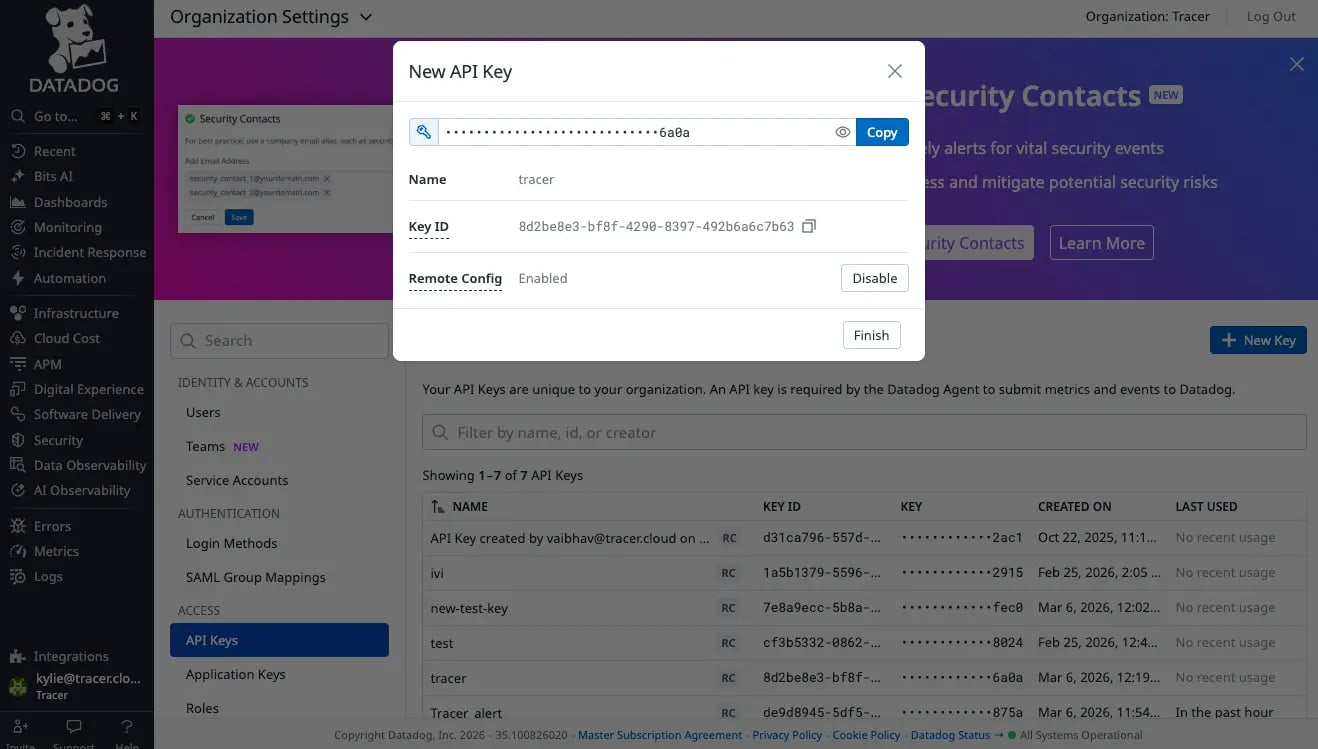
- Copy your new API key and hit Finish
Step 2: Create Application Key
In Datadog, create an Application Key. To create an Application Key, go to your personal settings in Datadog and click Application Keys. Or visit https://app.datadoghq.com/personal-settings/application-keys- Click + New Key at the top right of the screen
-
Name your new key tracer
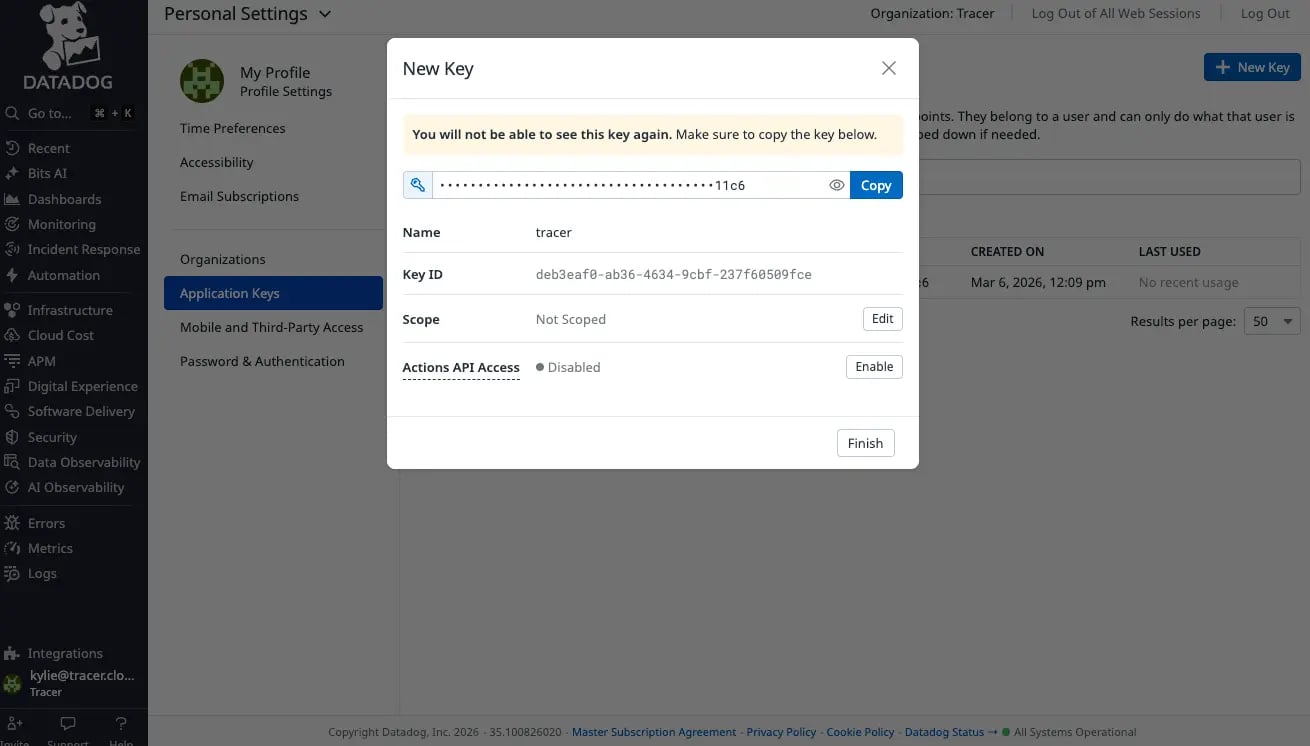
-
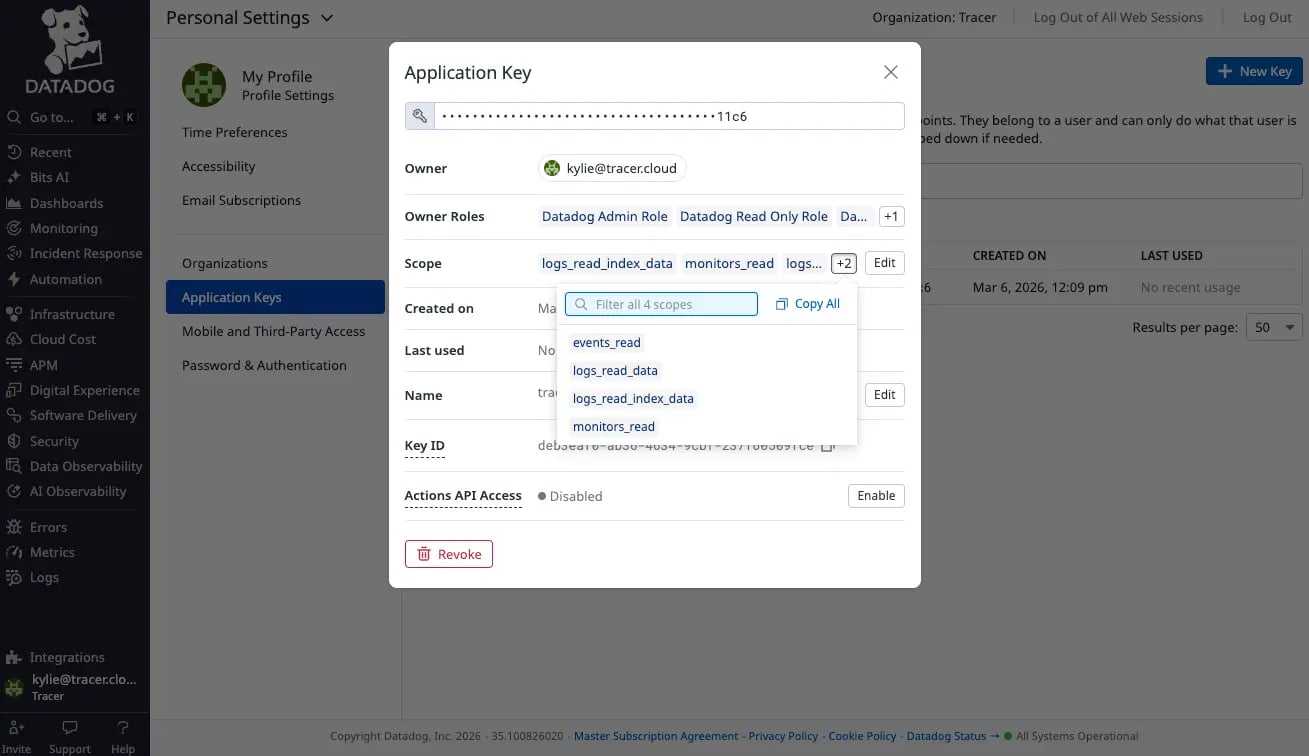
Click Edit Scope and ensure the following minimum requirements:
- events_read
- logs_read_data
- logs_read_index_data
- monitors_read
-
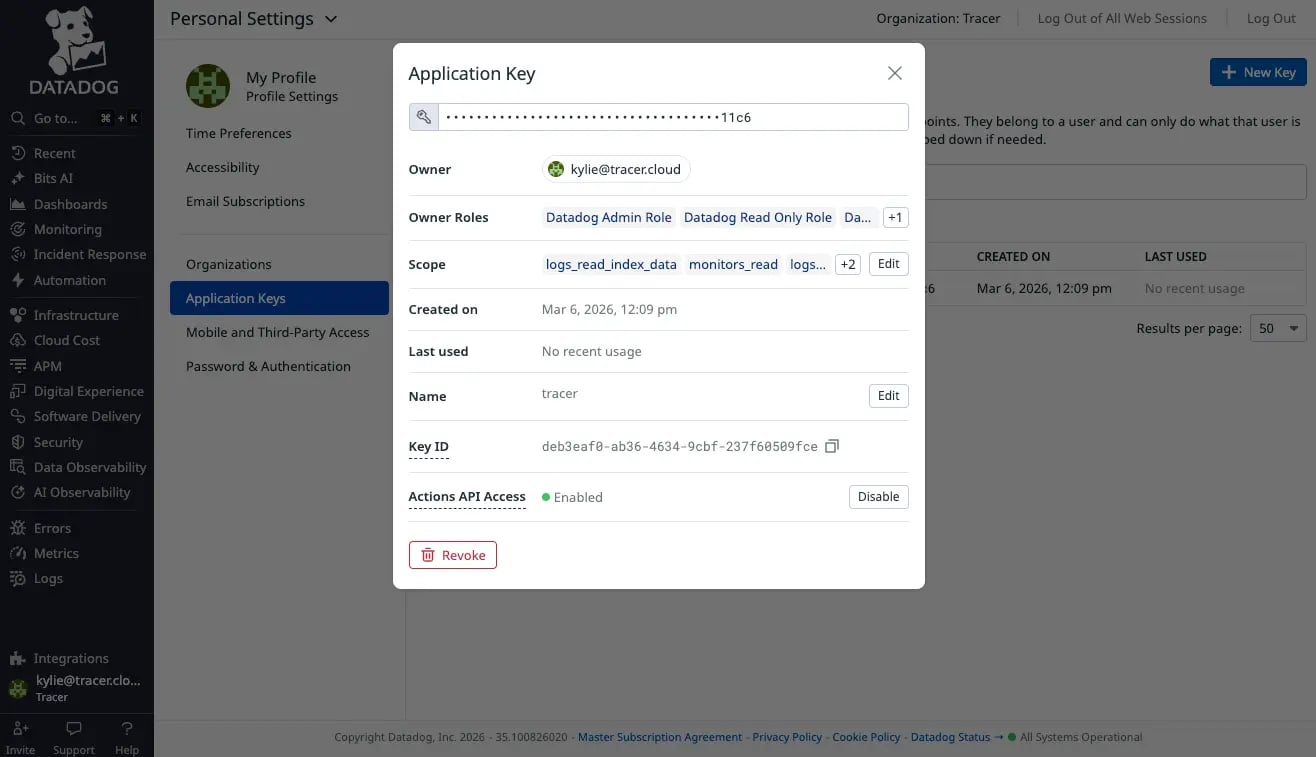
Under Actions API Access — click Enable
Step 3: Connect Datadog to HealOps
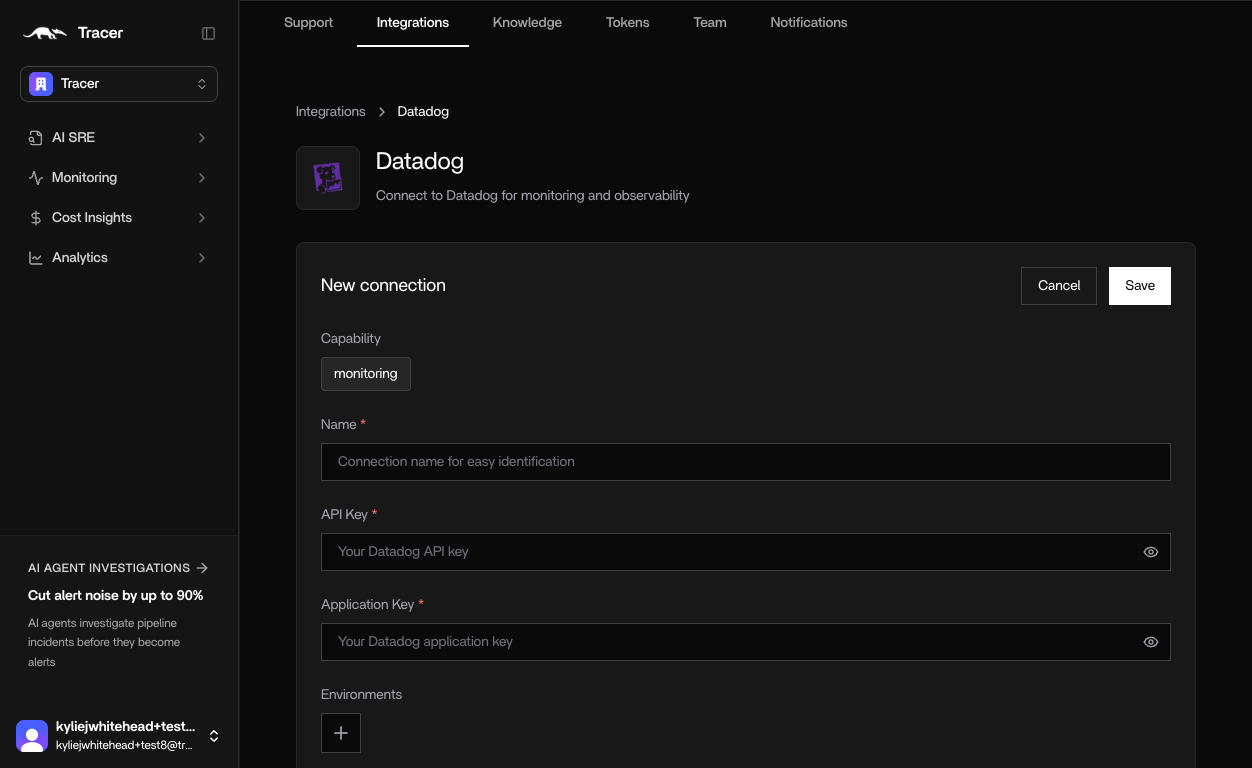
- In HealOps, go to Integrations → Datadog
- Enter a name
- Paste your API Key and Application Key from Datadog
-
Click Save.
SaaS Webhook Setup (push-based alert ingest)
The pull-based integration above polls Datadog for monitor events. For lower latency you can configure Datadog to push monitor alerts directly to HealOps via a webhook. HealOps validates each request with HMAC-SHA256 and routes it to the async investigation queue.Step 1: Generate a per-tenant webhook secret
Choose a strong random string (at least 32 bytes) to use as the shared secret. Store it in HealOps for your tenant using the credentials API:YOUR_TENANT_ID is your Clerk organization ID (visible in the HealOps dashboard
under Settings → Organization).
Step 2: Register the webhook in Datadog
- In Datadog, go to Integrations → Webhooks (or search “Webhooks”).
- Click New to add a webhook.
-
Set the URL to:
- Leave the Payload as the Datadog default (all fields are normalized automatically by HealOps).
-
Under Custom Headers, add:
The
{{WEBHOOK_HMAC_SHA256}}template variable is resolved by Datadog to the HMAC-SHA256 hex digest of the request body, signed with the secret you configure in the next step. - Click Save.
Step 3: Set the signing secret in Datadog
In the same webhook configuration, paste your secret (from Step 1) into the Secret field. Datadog will use it to compute{{WEBHOOK_HMAC_SHA256}}.
Step 4: Wire the webhook to a monitor
- Open the Datadog monitor you want to forward.
- In the Notify your team section, type
@webhook-<your-webhook-name>. - Save the monitor.